Disney Classics Series: Daisy Duck makeup look! :D

Hi sweethearts! ❤

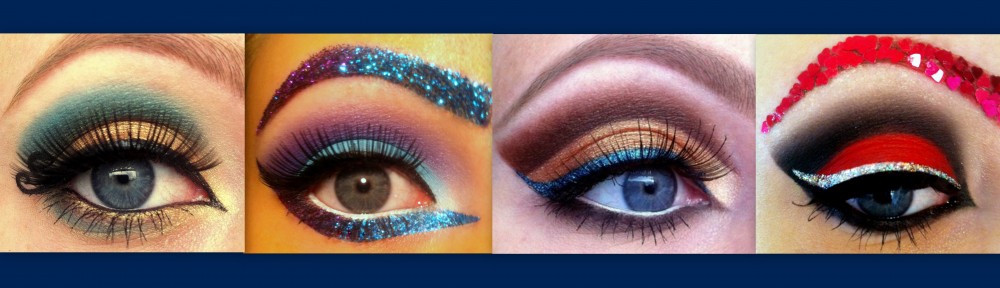
As you can see from the title, I’ve decided to call this series “Disney Classics Series”! 😀 And today I’m continuing it by creating a Daisy Duck inspired look! ❤ I’ve used some of my new, beautiful Makeup Forever eyeshadows for this look, and also the MUFE Flash palette! 😀 I hope you like the look!

Daisy makeup look

Video tutorial:

Products used: 

  • Sigma – Eyeshadow base in Persuade
  • Makeup Forever – Flash palette
  • Makeup Forever – Eyeshadows in 93, 9, 26 and 92
  • Sigma – Eyeshadow in Allure
  • Violet Voss – Glitter Adhesive and glitter in Victoria
  • Too Faced – Heaven eyeshadow
  • Sugarpill – Eyeshadows in Tako and Diamond Eyes
  • L’Oreal – False lash wings mascara
  • L’Oreal – Super Liner in Carbon Gloss
  • Ardell – False eyelashes in Demi Wispies

Daisy Duck makeup

I used lots of Fanatic Cosmetics brushes in this video and I have a 10% off dicount code for my followers, if you’re interested in getting some awesome, super soft brushes! 😉 Code: GLITTERGIRLC10

Daisy makeup

Daisy Duck makeup look

Here you can see the Violet Voss “Victoria” glitter used as nail polish! 😀 I have a step by step written tutorial on my Instagram ^-^

Fushia glitter nails

Have an amazing weekend, lovelies! ❤

GlitterGirlC 🙂

Spring Leopard Nails!

Hi guys! ^-^ I know I haven’t posted as many looks as I usually do, these last two weeks, because I’m trying to focus on reading for my exams. I’m going to try to at least make one makeup look a week though! 😉 I haven’t worn makeup in two weeks, so my hands are itching for my colorful eyeshadows, lol 😛 I can’t wait for June to come… Then I’ll do lots and lots of looks! 😀 I just thought I’d let you know what’s going on. 🙂

Anyway, wearing pretty nail colors has gotten me through these “non- makeup weeks.” xD I’ve been obsessed with my Julie G nail polishes, as you might have noticed! I made this design on my sister last week, with the colors she liked the best, and I had to try it myself. I made a quick tutorial as well, which I hope you find helpful! ^-^

Products used:

  • Sally Hansen – Complete Care 4-in-1 nail treatment
  • Julie G – Gelato in Venice
  • Julie G – Bikini
  • Viva la Diva – Nr. 53, Black
  • Seche Vite – Dry fast top coat
  • Toothpicks

How to:

Apply a base coat and when that’s dry, one thick coat of “Gelato in Venice.”

Place some of “Bikini” onto a sheet of paper and pick some of the color up, with a toothpick. Create different sized and shaped dots, with that hot pink.

Now, put some black colored nail polish onto the paper. Pick a little bit up with a new toothpick. Carefully make some black strokes on each side of the pink dots and make them all in different sizes. Every leopard has an unique pattern, so the design doesn’t have to be geometrically perfect! In the end, place some small, random dots of black in between the pink dots. Wait at least an hour, before you apply a top coat. 🙂

This is a very easy design, which I think anyone can do! I’m right handed, so I know it would have been difficult to apply the black on my right hand. I always get my boyfriend to do this on that hand and I must say he does a great job, (otherwise, I wouldn’t have worn it out, lol 😉 ) So get someone else to do that for you, if you find it difficult! ^-^

I bought the JulieG nail polishes at jessesgirlcosmetics.com 🙂

I hope you liked this nail design!

GlitterGirlC 🙂

Fun French! :D

Hi lovelies! ❤ On friday, I finally got my 6 JulieG nail polishes, that I’ve been super excited about trying! 😀 One my favorite beauty gurus on youtube, Julieg713, just launched her own nail polish line. After seeing the amazing colors she made, I had to get some of them! I bought them at www.jessesgirlcosmetics.com 🙂

I thought the two colors “Fierce & Fab” and “Dream in Pretty” looked very good together, so I made a colorful French manicure. I also added some rhinestones to the ring finger, to spice up the design! 😉

Products used:

  • Sally Hansen – Complete care 4-in-1 nail treatment
  • JulieG – Dream in Pretty nail polish
  • JulieG – Fierce and Fab nail polish
  • Seche Vite – Dry fast top coat
  • Rhinestones from ebay

In daylight, these two colors look pink, but in bathroom lighting they look lilac and purple. You can see the difference from the pictures above. When they look purple, I think they match my “Purple Love” look, that I did a couple of months ago. That’s just a tip to what kind of makeup you can wear with this nail design! ^-^

I can’t wait to show you the rest of the colors I got from this nail polish line. I’ve been wearing this since friday and it just started chipping today. Usually, the nail polishes I’ve had, have started chipping the next day, so these are fabulous! 😀

I hope you enjoyed the nail polish design!

GlitterGirlC 🙂

Blue Glittery Nails :)

I got this H&M Blue My Mind nail polish for Christmas. I really love that gorgeous and bright blue colour, so I thought I’d create a nail design with it. 🙂

Products I used:

  • Sally Hansen – Complete Care 4-in-1 Nail Treatment
  • H&M – Blue My Mind nail polish
  • Seche Vite – Dry Fast Top Coat
  • NYX – Glitter on the go in Cool Blue
  • Blue nailart rhinestones from Ebay
  • DUO – Eyelash adhesive

How to:

  1. Apply a base coat
  2. Apply your favorite blue nail polish
  3. Make your nailpolish last longer by applying a top coat
  4. When your nails are dry, cover your nail (except for the tip of the nail where you want the glitter), with a piece of paper. This will create a sharp line when you apply the glitter.
  5. Apply a clear nail polish to the tip of your nails and cover this area with blue glitter. I used a flat synthetic brush to pick up the glitter and place it gently onto my nails.
  6. Remove the paper
  7. When this is dry, apply blue rhinestones along the glitter line
  8. All done 🙂

GlitterGirlC 🙂